https://maz0r.github.io/cu80-flashguide/ – Please ensure you use this page for the save as commands to work!
Capsunlocked CU80 firmware flashing guide
Quick guide on flashing your stock CU80 (v2 PCB) to a newer firmware version.
This is a reference/guide to help fellow CU80 v2 owners flash firmware and/or recover from a bad flash.
Important notes
- Basic QMK firmware was shipped with Round 2 boards
- This allows for little to no modifications outside changing the LED lighting.
- QMK Configurator is targeted to a specific board layout so ensure you use the correct file when flashing.
- This can be configured to an extent by the end user, and is baked into a new firmware .hex, this type of firmware should be considered “untested” until you flash it and confirm its working yourself.
Flashing Requirements
QMK Toolbox
The QMK Toolbox is designed to make flashing firmware simple the only real thing to watch out for is the “device not found” error which can be fixed using Zadig as detailed in the QMK documentation
A valid .hex file for your keyboard
- VIA compatible .hex files will eventually be found at caniusevia or here with fixes for the RGB keymaps
- .hex files from qmk.fm
- .hex file(s) will also be posted in the #latest-firmware channel on the Capsunlocked discord server.
- .hex file(s) created using QMK Configurator. [for v2 PCB’s you must use the capsunlocked/cu80 to generate firmware, not the v1 cu80 entry]
In all cases you should also have a working .hex from #latest-firmware to use as a “roll back”.
Test Binaries
The following test binaries were built using the recently released QMK 0.12.37. If you are having issues with your board not waking from sleep, please give these a go:
RIGHT CLICK SAVE AS!!
| Firmware Type | Layout | Link |
|---|---|---|
| Default | ANSI | Link |
| Default | ISO | Link |
| RGB | ANSI | Link |
| RGB | ISO | Link |
| VIA | ANSI | Link |
| VIA | ISO | Link |
| VIA RGB | ANSI | Link |
| VIA RGB | ISO | Link |
Test VIA Sideload files – note VIA support should now be official.
RIGHT CLICK SAVE AS!!
| Firmware Type | Layout | Link |
|---|---|---|
| VIA | ANSI | ANSI Sideload |
| VIA | ISO | ISO Sideload |
| VIA RGB | ANSI | ANSI RGB Sideload |
| VIA RGB | ISO | ISO RGB Sideload |
Layouts – layouts have been standardised.
| Firmware Name | Link |
|---|---|
| v2_iso | UK |
| v2_ansi | UK,US |
For sideloading into VIA see sideloading in via
Getting ready to flash
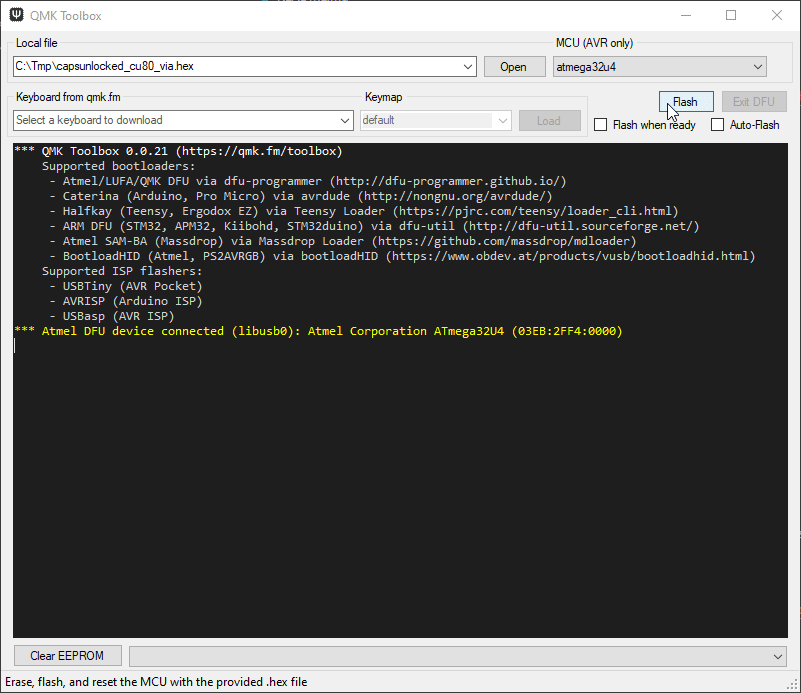
Connect your keyboard Launch QMK Toolbox
Select firmware to flash
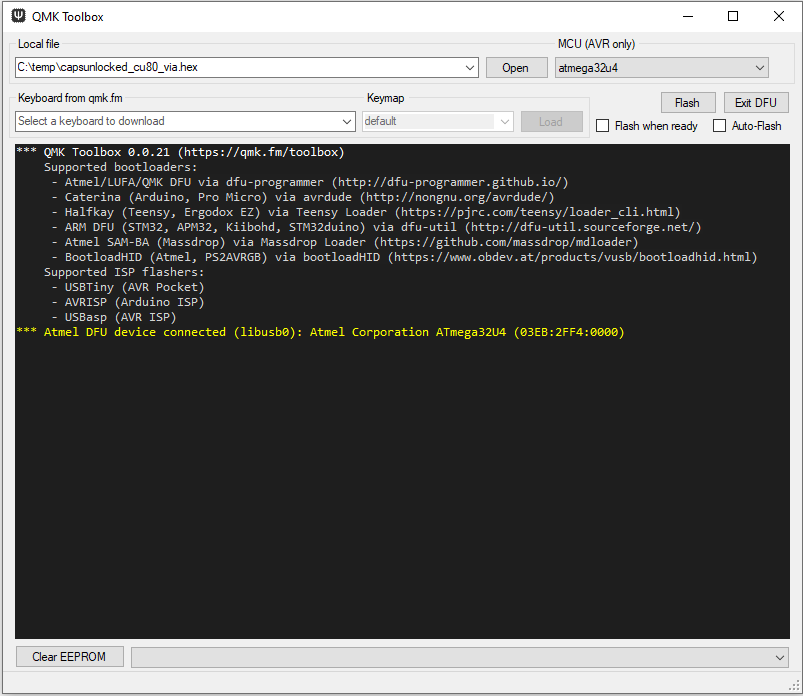
In QMK Toolbox select Open & navigate to your .hex file and click open
Enter DFU (device firmware upgrade) mode
This mode will persist until firmware is flashed or keyboard power is cycled unless no firmware is present.
Stock firmware
- If the keyboard is functional
- FN + DELETE will reboot into DFU mode
- If the keyboard is not functional use the Hardware Reset
VIA Firmware
- If the keyboard is functional
- FN + ESC will reboot into DFU mode
- If not use the Bootmagic method
Bootmagic Firmware
- Disconnect the USB from the keyboard
- Reconnect the USB cable while holding ESC on the keyboard
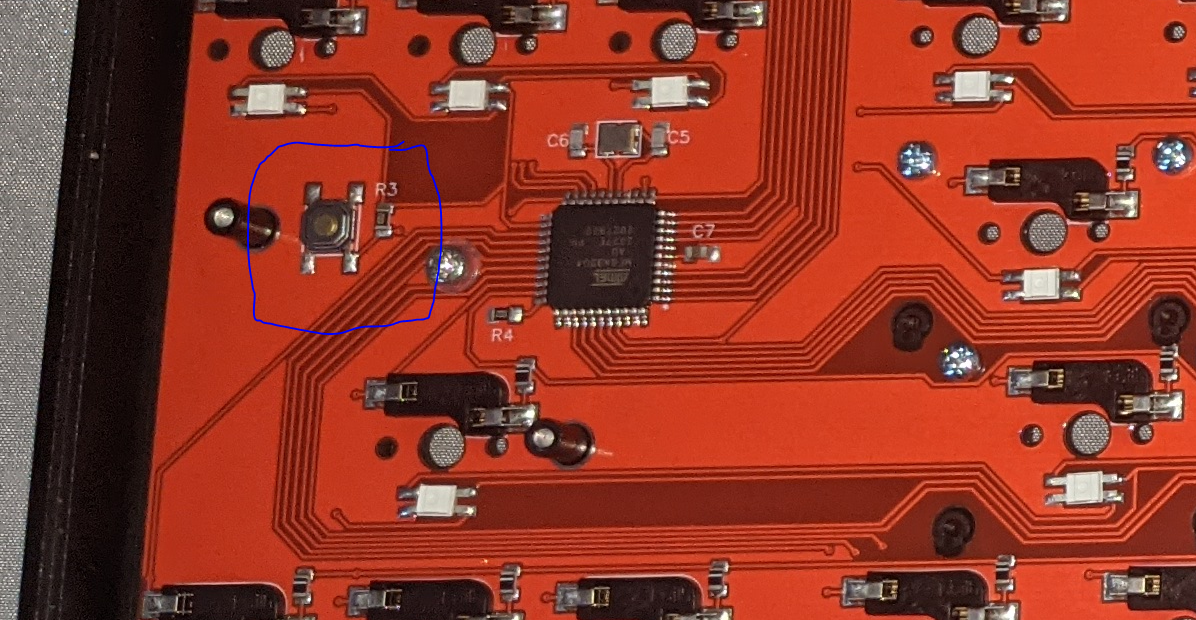
Hardware Reset
- Remove the backplate
- Plug in the keyboard
- Press the physical reset button on the back of the PCB
Verify you are in Bootloader Mode
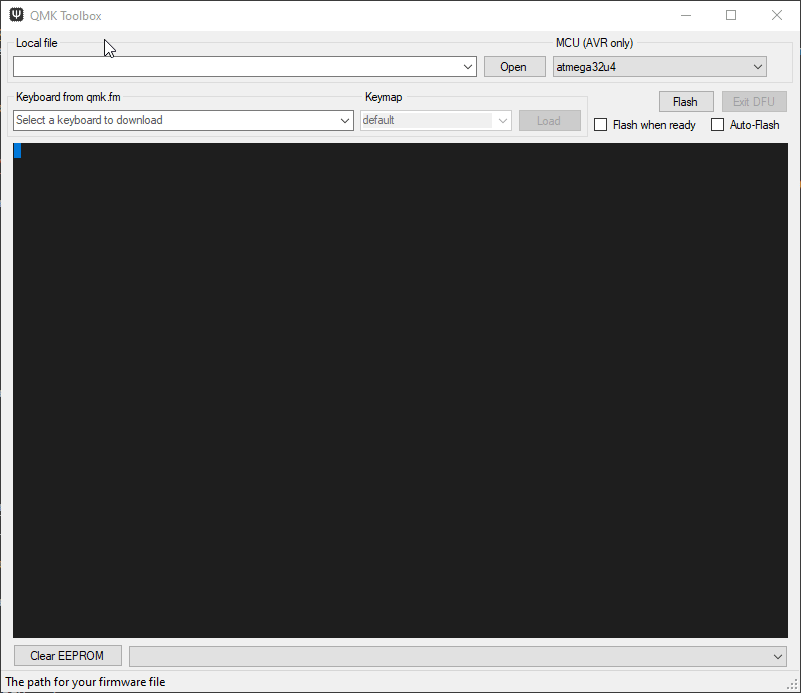
If you have successfully entered bootloader mode, the keyboard should disconnect and reconnect (you may hear a sound in windows)
Shortly after re-connecting you should see a yellow line appear in your QMK Toolbox window as per the below image.
If you have a different message check out the Zadig troubleshooting steps on the QMK site.
for MacOS users you may have to tick the “Auto Flash Firmware” button for the device to be detected by QMK Toolkit!
Clearing the EEPROM
It’s recommended that you clear the EEPROM if you’re having any weird issues with any firmware you try, especially VIA-based firmwares. They store their configuration in spare EEPROM space, so clearing it will let the board start from a known good place so you can set it up again. Use the Clear EEPROM button in the bottom left of the QMK Toolbox UI to do that, then flash a firmware again straight afterwards as Toolbox asks you to!
Flash the firmware
Click flash!
On completion the keyboard should disconnect and begin functioning as per its new firmware.
Configuration using VIA
Setup
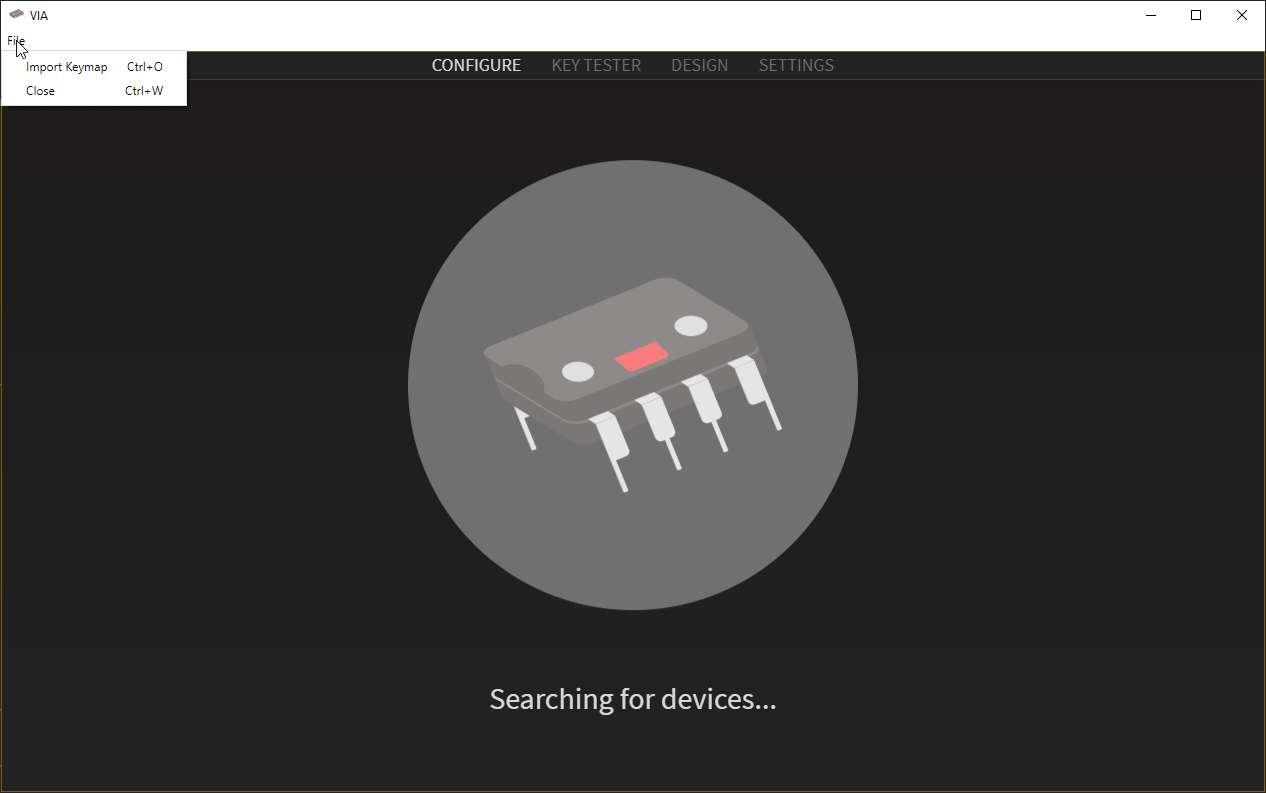
- Download VIA
- Launch VIA
If your keyboard is not automatically detected it can caused by several factors
- You do not have a VIA compatible firmware flashed
- The version of the VIA app you are using does not include the keymap for your board it may take a little while for the board to be added to the software. See sideloading in via.
- You are still in bootloader mode
- You would not be able to type if that was the case.
Sideloading in VIA
See above for the test .json files for sideloading while official support in VIA is still pending.
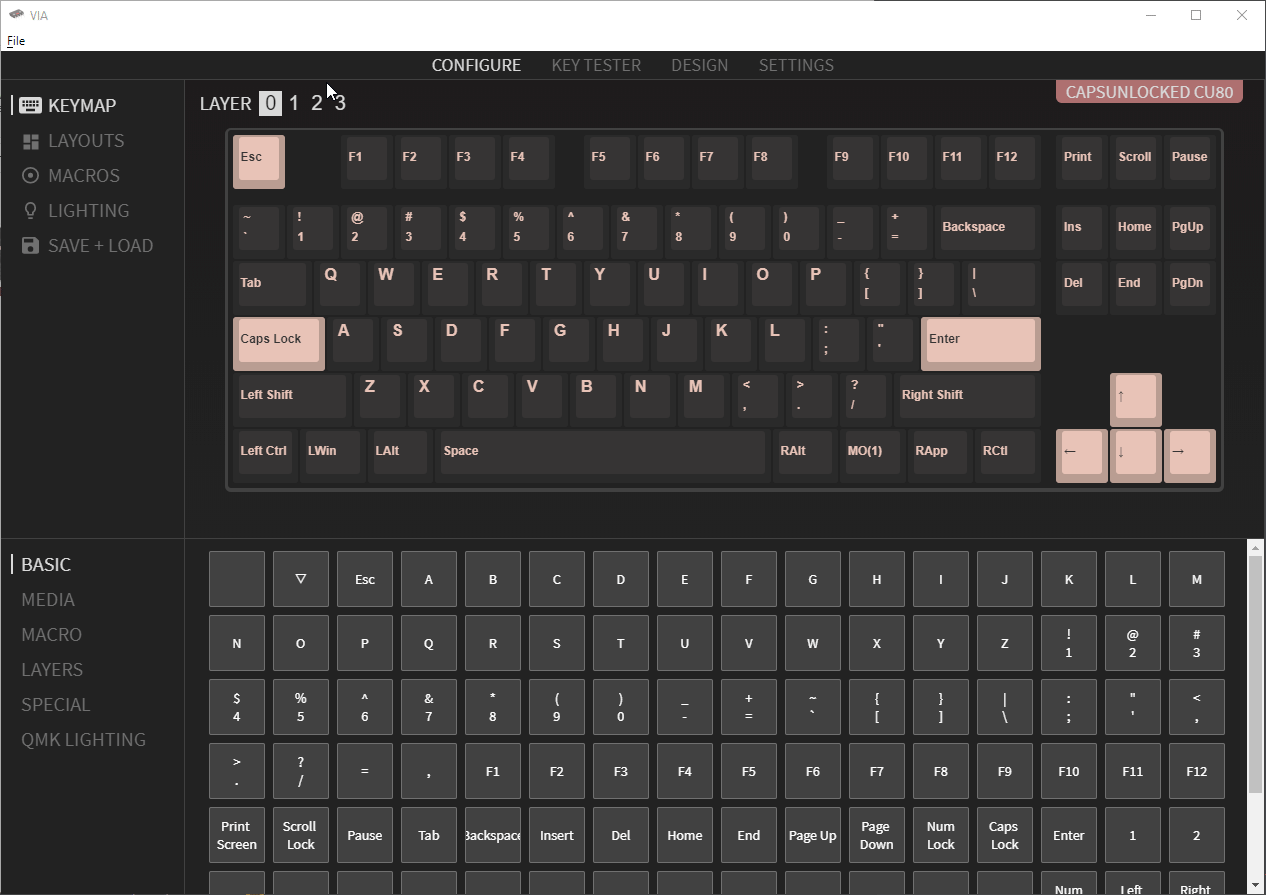
Basic VIA Configuration (like real basic)
Things may be appear differently for you as this is from a test firmware/keymap
Once your keyboard has been detected in VIA, you should be presented with the following screen.
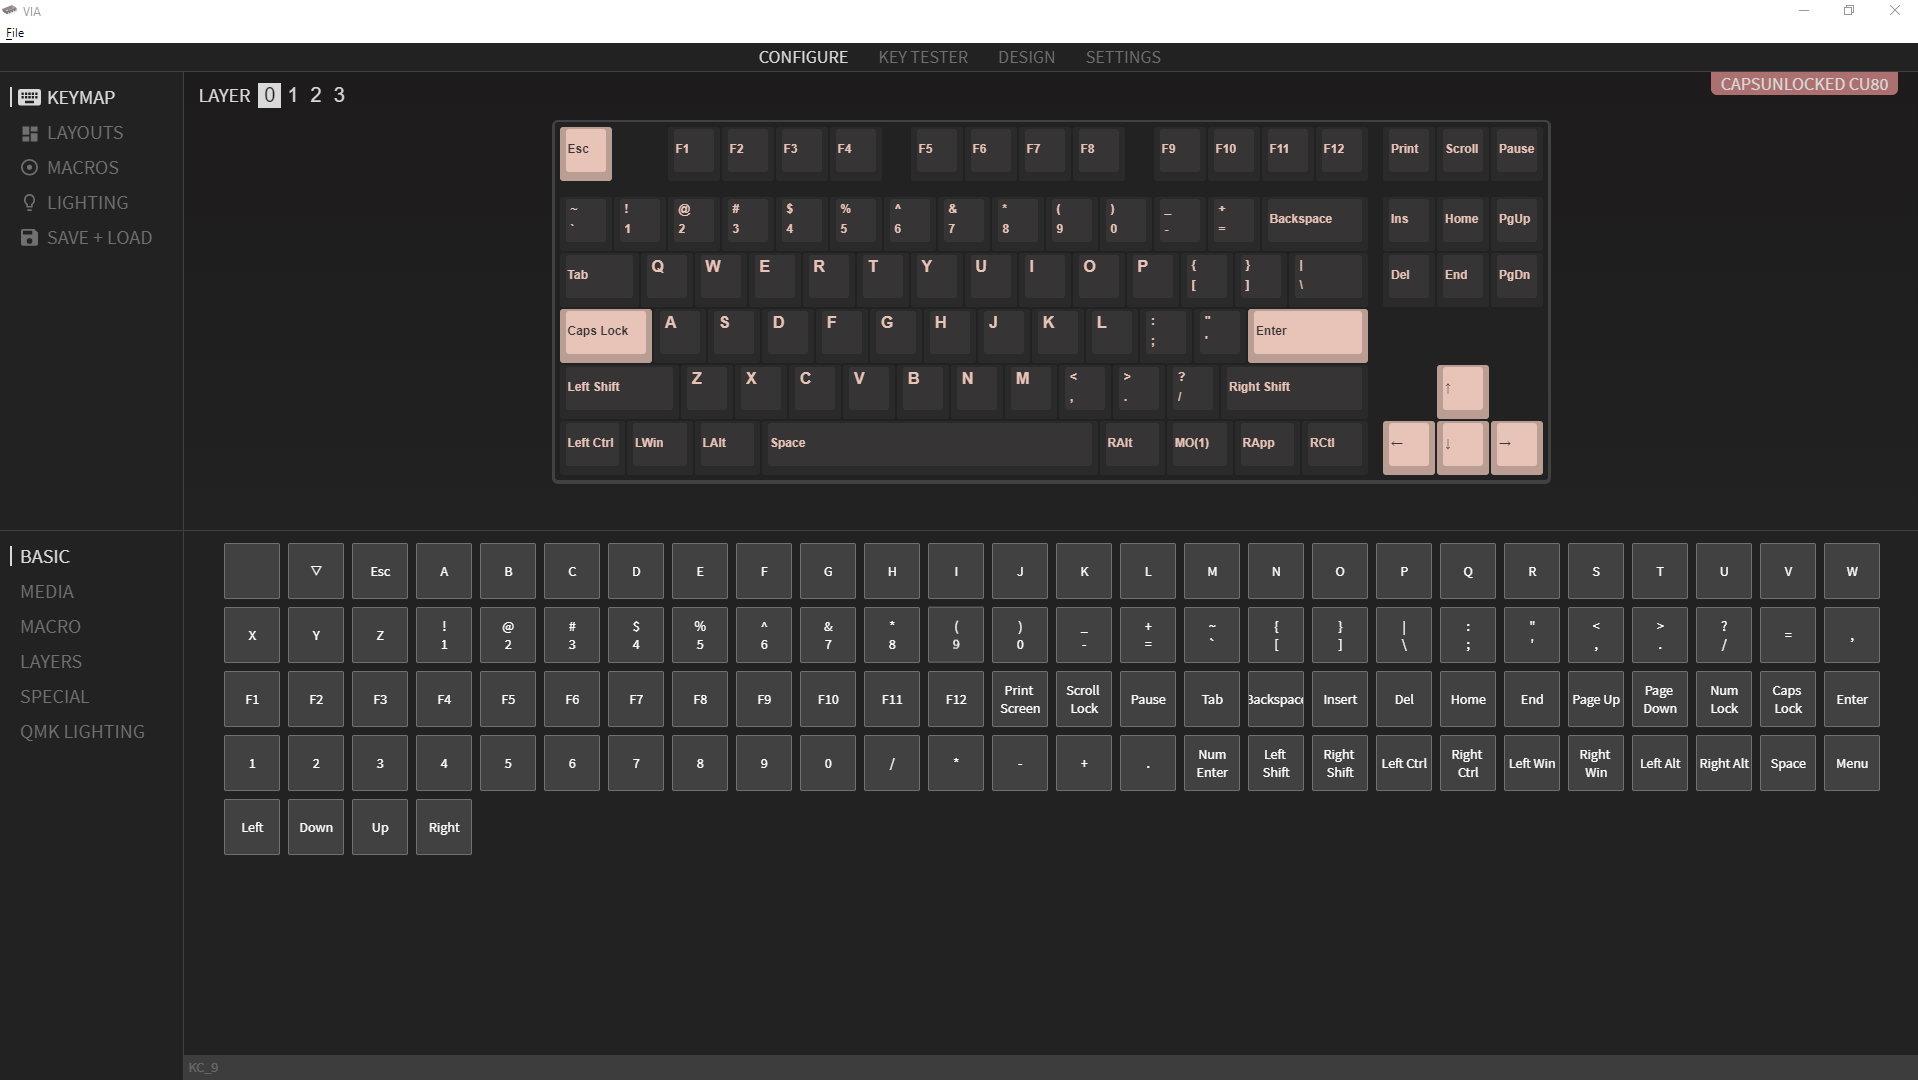
From here you can edit most functions of the keyboard from creating macros to rebinding layers.
Remapping a Key
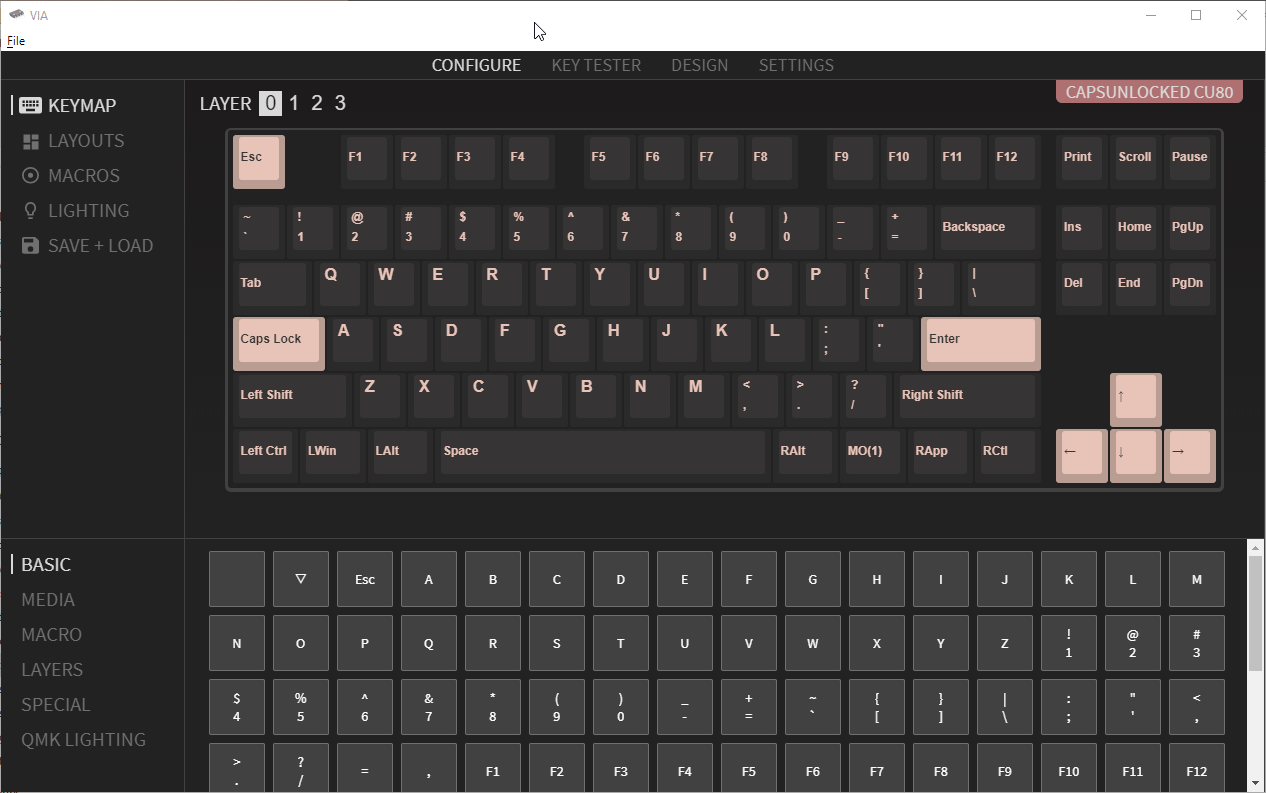
Editing Layers