klipper_canbus
MELLOW FLY SHT 36/42
Important notes about this board.
The pins PC15, PB1 are not suitable for Klicky/Endstop and should be avoided.
The probe port only supplies 5v so may not work with certain inductive probes.
- Pinda / BlTouch style probes will work fine
Flashing the canboot firmware via DFU on SHT36/42 (ST32F072C8)
Before proceeding it is critical that your CAN network is configured for your printer, failure to setup the network will cause a problem when you try to connect devices :) click here and select your controller for setup instructions!
Generate the CANboot firmware file
-
clone the CanBoot repository to your pi
cd ~/ git clone https://github.com/Arksine/CanBoot -
run the following
cd CanBoot make menuconfig -
Configure your makefile for the SHT 36 / 42 with STM32F072
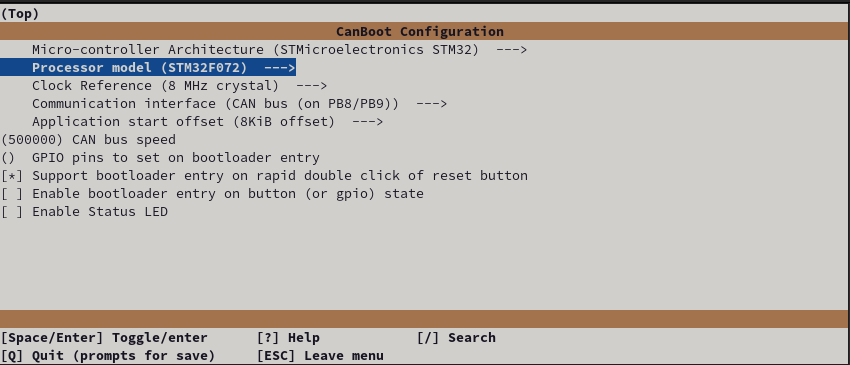
Exit using ESC or Q, confirm with yes(Y)
-
Build the firmware
make clean

make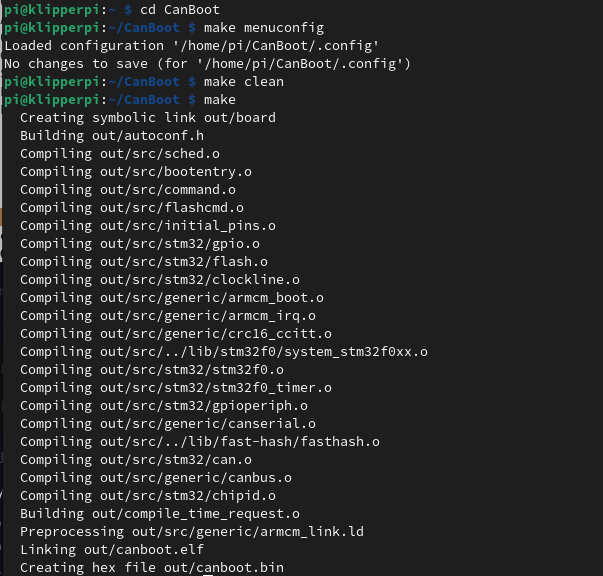
Hook up the Board for flashing
-
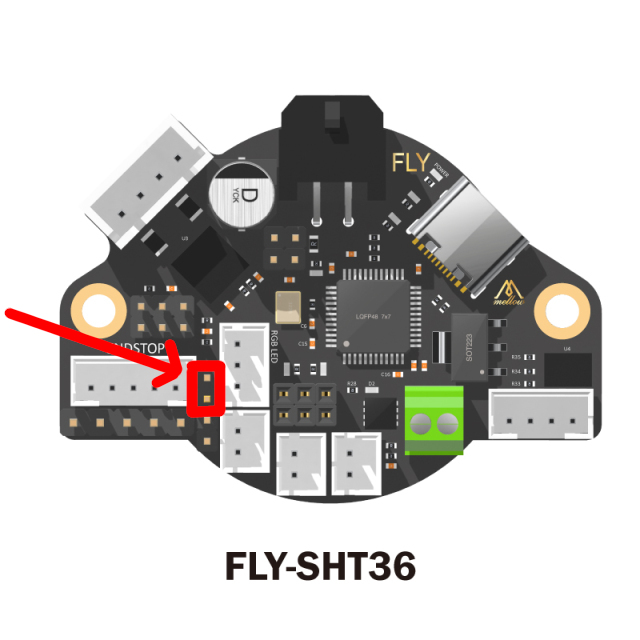
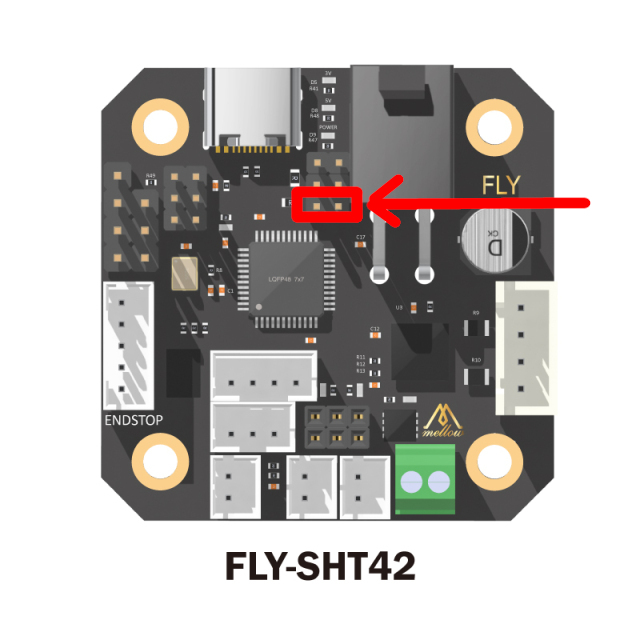
Add the boot jumper to the pins highlighted below
-
Connect your device to your PI via USB
- Verify the device is in bootloader mode by using
lsusb- you should see something like
Bus 001 Device 005: ID 0483:df11 STMicroelectronics STM Device in DFU Mode
- you should see something like
-
Flash the canboot bootloader to the board YOUR DeviceID (0483:df11) may be different CHECK IT! (see step 2)
-
ERASE AND FLASH THE CANBOOT FIRMWARE
sudo dfu-util -a 0 -D ~/CanBoot/out/canboot.bin --dfuse-address 0x08000000:force:mass-erase:leave -d 0483:df11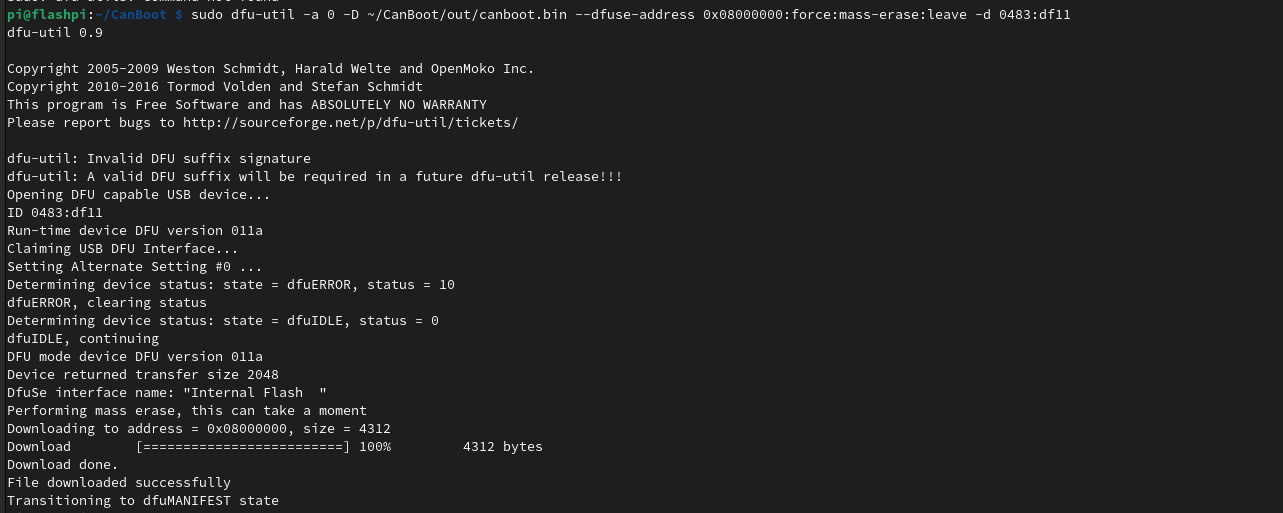
NOTE: If you see an error after the above, don’t worry its fine, provided you have the “File Downloaded Sucessfully” and text above
-
Power off the SHT, remove the boot jumper, and insert the CANBUS cable
-
You can now power up your printer with the toolhead board attached via the appropriate wiring scheme using the H L 24v and gnd wires.
-
Wait for the device to boot and ensure your CAN0 network is up and you can see the device
~/klippy-env/bin/python ~/klipper/scripts/canbus_query.py can0or
~/CanBoot/scripts/flash_can.py -i can0 -qYou should see something like
"Found canbus_uuid=XXXXXXXXXX, Application: CanBoot" -
Assuming the above gave you a UUID you can now flash Klipper to your board via CanBoot… (if not see the troubleshooting section here)
cd ~/klipper
make menuconfig
Enable low level configuratation set the following.
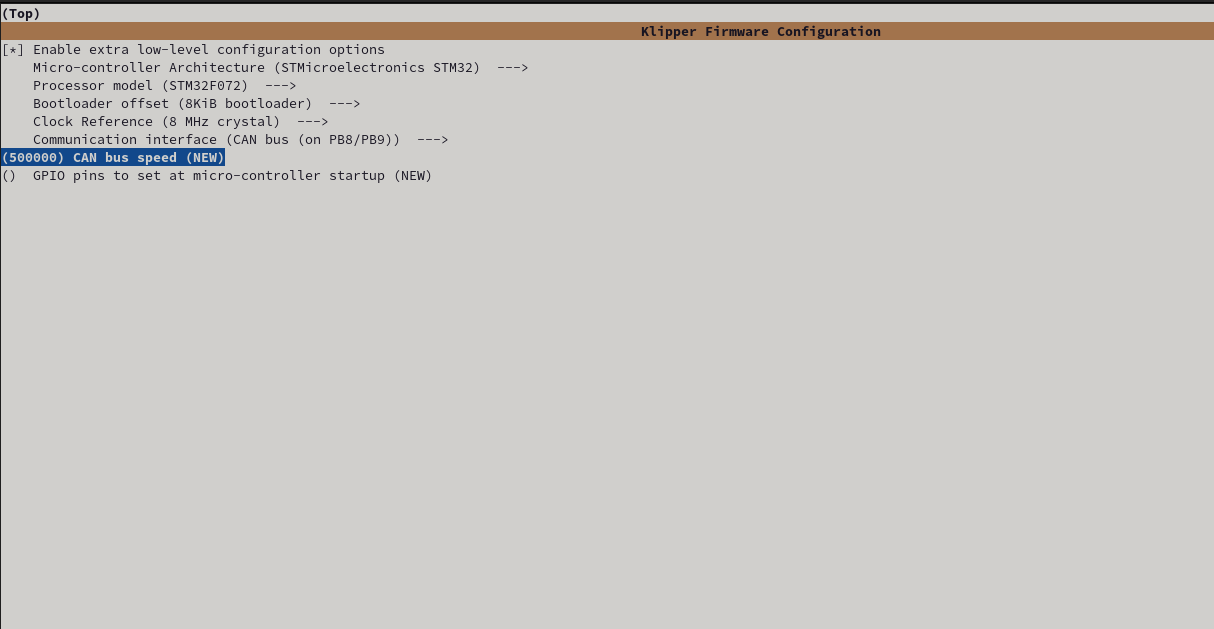
Hit Q to exit and select Y to save changes.
make clean
make
You can now flash the board
python3 ~/CanBoot/scripts/flash_can.py -i can0 -f ~/klipper/out/klipper.bin -u MYUUID
If all is well you now have a klipper firmware on your SHT.
To verify this you can query the canbus uuid with
~/klippy-env/bin/python ~/klipper/scripts/canbus_query.py can0You should see something like
"Found canbus_uuid=XXXXXXXXXX, Application: Klipper"
Need a config here you go
Enjoy!
